Engraving
Select ENGRAVING from the Types of Work page then click on the NEXT button

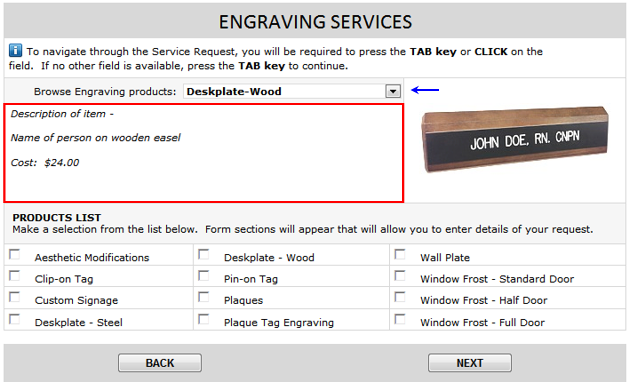
Browse Engraving Products
Use the 'Browse Engraving products' dropdown menu (blue arrow) to view descriptions and sample images of the products offered. In the example below, the 'Deskplate-Wood' product was selected and its description is shown (red box).
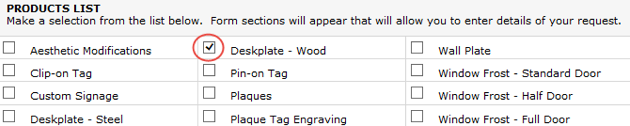
Products List
The Products List shows 12 different types of engraving products that can be requested using the Service Request form. To select a product type, click inside the product's checkbox.
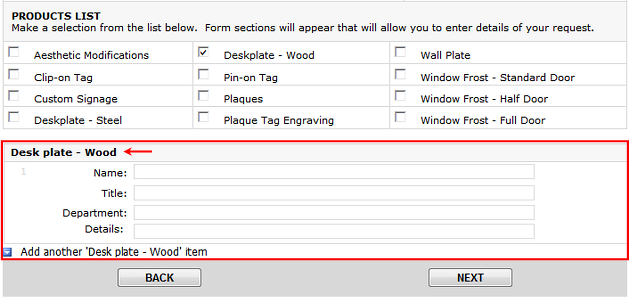
Repeating Sections
Once a product has been selected, a "Repeating Section" of the form (red box) appears below the Products List section. The Repeating Section is headlined with the name of the product that was selected (red arrow). Repeating Sections allow you to enter information for multiple instances of the product.
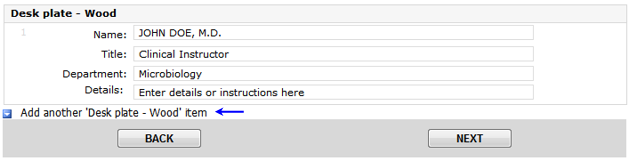
Add Additional Entry
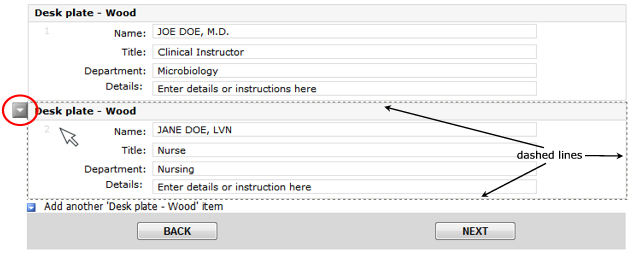
In the example below, entries have been made for a 'Desk plate - Wood' item. To make an additional entry, click on the 'Add another 'Desk plate - Wood' item' link (blue arrow).
An additional section for Desk plate - Wood appears below the one previously filled in.
![]()
Delete An Entry
To delete an entry, hover your mouse on the section that you want to delete. In the example below, the second entry will be deleted. As you hover on the section, dashed lines will appear around the section as well as a white down arrow in a gray box to the left (red circle).
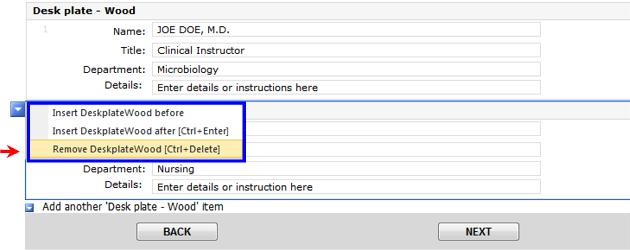
Click on the white down arrow and a mini menu will appear (blue box). Click on the 'Remove DeskplateWood' item on the menu (pointed by red arrow).
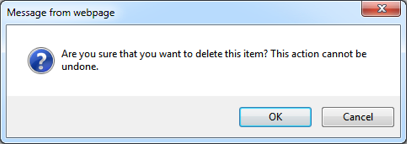
You will be prompted with the message below for confirmation. Click on the OK button.
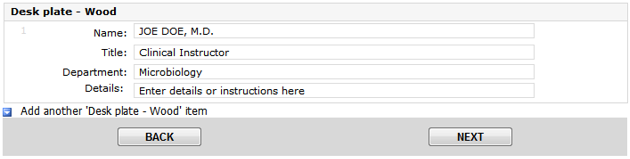
The second entry has been deleted.
Selecting Different Product Types
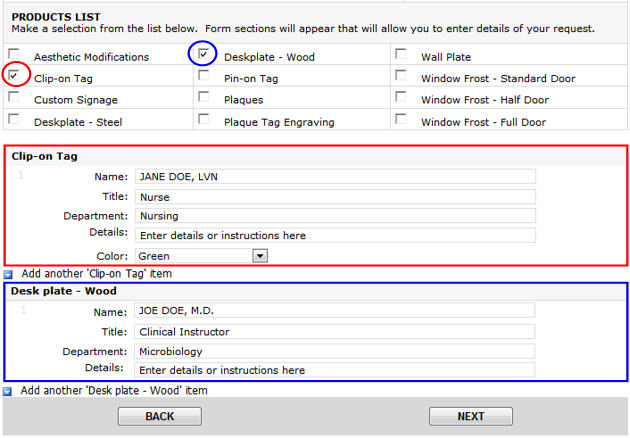
You can select different product types at the same time. In the example below, Clip-on Tag and Desk plate - Wood have been selected.
Notes:
- The total number of items that can be requested at one time should not exceed ten (10).
- In the Products List section, the products are listed alphabetically. As you select different product types, the Repeating Sections of the products will be sorted alphabetically as well. As the example above shows, the 'Clip-on Tag' section goes before the 'Desk plate - Wood' section. If you had selected 'Desk plate - Wood' first and then selected 'Clip-on Tag', the Repeating Section of 'Clip-on Tag' will appear on top of 'Desk plate- Wood'.
Print Screen page
After clicking on the NEXT button, the Print Screen page of the Service Request form will appear. This page will show the completed Department Information and Engraving sections of the form and will allow the requestor to print the form if desired. A blue banner on top gives printing instructions. This is the only time that the form can be printed.
![]()

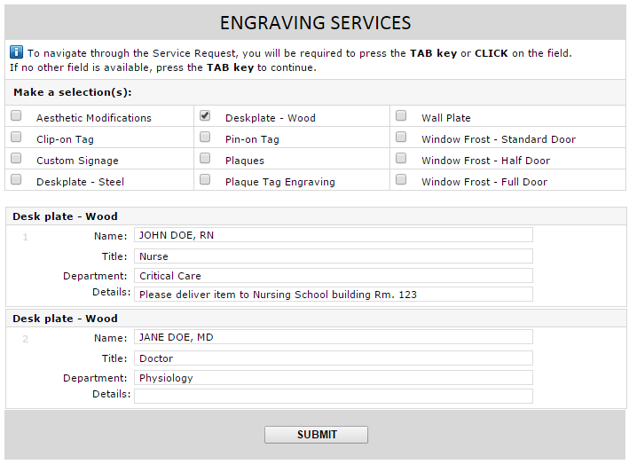
Submitting the Service Request
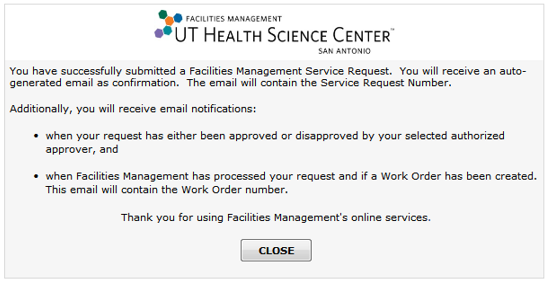
Click on the SUBMIT button. A small page will appear confirming the action. This page informs the requestor that email notifications will be sent based on events that will occur as the service request goes through its workflow. Click on the CLOSE button to close the page.
Service Request Workflow and Approval Process
As part of the Service Request workflow, emails will be sent to the requestor and approver.
The email sent to the requestor will confirm that the request has been successfully submitted. It will contain the Service Request number and a general description of the work requested.
The email sent to the approver will contain the Service Request number, a general description of the work requested, and the name of the requestor who submitted the request. The email will also contain a link to the Service Request form. When the form is opened on the approver's internet browser, the approve will decide whether to approve or disapprove the request.