Move
Select MOVE from the Types of Work page then click on the NEXT button
![]()
This sub-section of the MOVE form will appear. To proceed further, you must select 'Yes or No' to indiciate whether or not the items are to be moved to the UTHSCSA Warehouse.
If you select 'No' (red circle), to indicate that the items WILL NOT be moved to the UTHSCSA Warehouse, you will be required to fill out the form as shown below.
Note: It is important that all fields marked with a red asterisk ( * ) are filled in. Incomplete entries will not be processed.
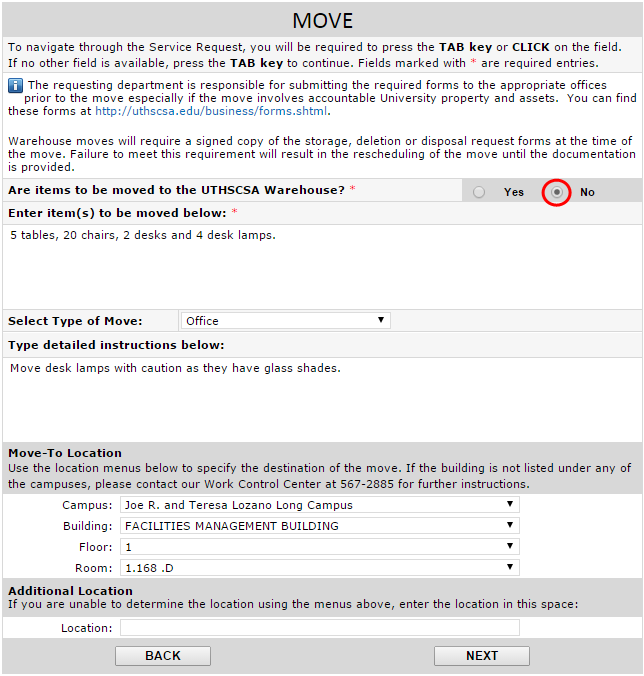
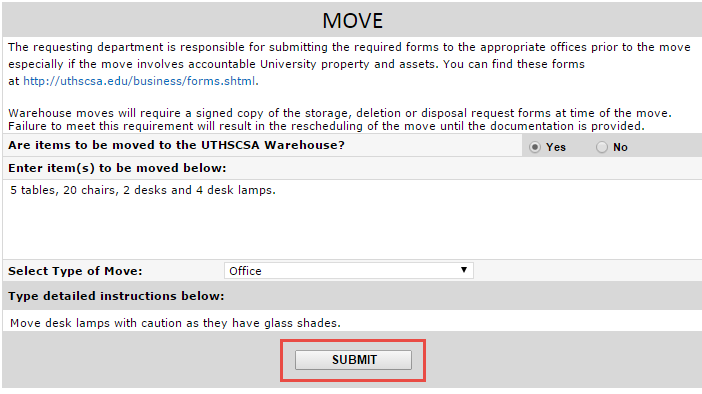
In order to proceed, you will need to fill out the section labelled 'Enter item(s) to be moved below' (red box).

Once you have provided a description of the items to be moved, you will need to make a selection in 'Select Type of Move' (red arrow).

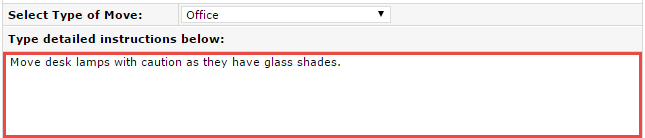
If you choose 'Office' as the type of move, you can proceed to enter any detailed instructions required for the move.
If you choose 'Lab Clinical' as the type of move, read the disclaimer and then check the box marked 'OK' (red box) before entering any detailed instuctions.

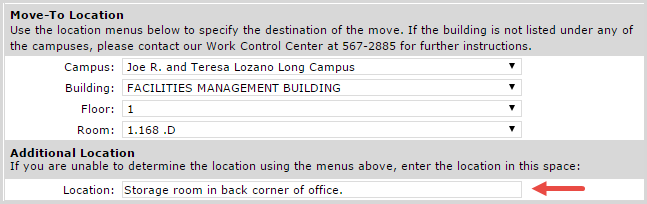
Once you have entered the detailed instructions, you will then be required to fill out the section labelled 'Move-To Location' to specify where the items will be going.
You may utilize the space under 'Additional Location' to identify a location that is not available in the menus (red arrow).
Once you are finished with the form you may click the NEXT button.
![]()
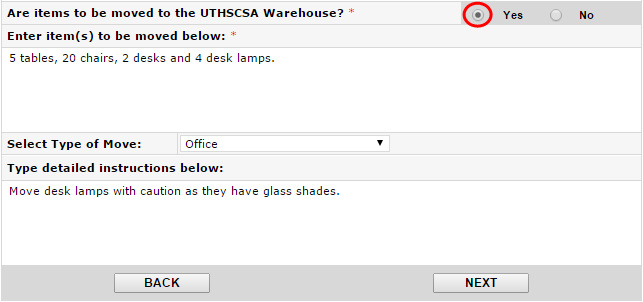
If you had selected 'Yes' (red circle), to indicate that the items WILL be moved to the UTHSCSA Warehouse, you will not be required to fill out the location information, as shown in the form below.
Once the information has been provided, you may click on the NEXT button.
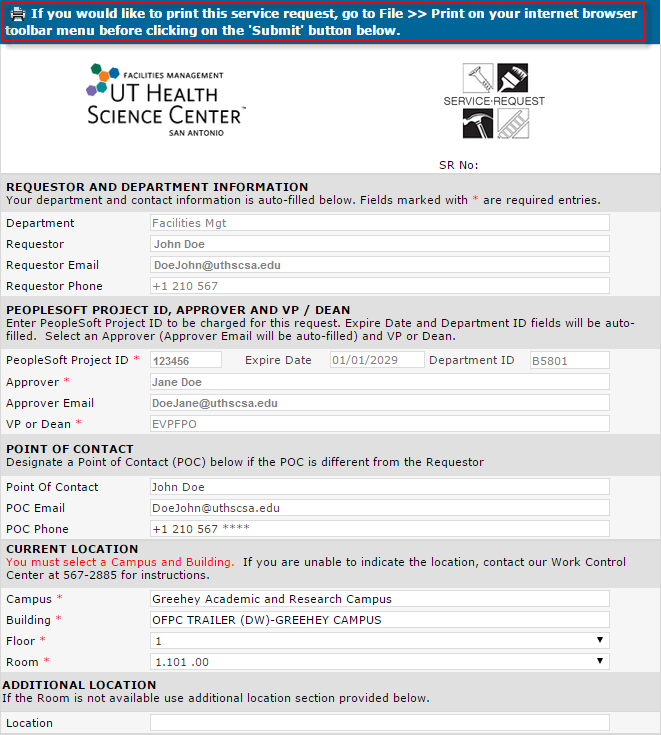
Print Screen Page
After clicking on the NEXT button, the Print Screen page of the Service Request form will appear. This page will show the completed form and will allow the requestor to print the Service Request form if so desired. A blue banner on top gives printing instructions. This is the only time that the form can be printed.
Submitting the Service Request
Once you have reviewed the information and you are ready to submit the Service Request, scroll down and click on the SUBMIT button.
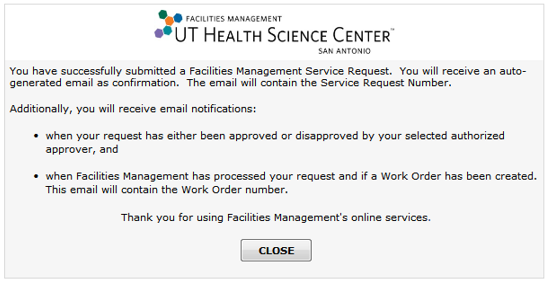
After clicking on the SUBMIT button, a small page will appear confirming the action. Click on the CLOSE button to close the page.
Service Request Workflow and Approval Process
As part of the Service Request workflow, emails will be sent to the requestor and approver.
The email sent to the requestor will confirm that the request has been successfully submitted. It will contain the Service Request number and a general description of the work requested.
The email sent to the approver will contain the Service Request number, a general description of the work requested, and the name of the requestor who submitted the request. The email will also contain a link to the Service Request form. When the form is opened on the approver's internet browser, the approve will decide whether to approve or disapprove the request.